Create, compose, preview and save the layouts that give exported and published documents their cover, contents, page furniture and styling, choose the default and manage corporate fonts.
A document layout decides how a document looks when ComplyTrain turns it into a PDF or Word file: the pages before the body (a cover page, a table of contents), the pages after it (an approval page, a references appendix), the running header, footer and watermark, and the colours and typography. The content of the document stays the same whichever layout you use.
Layouts belong to the whole organisation. One of them is the Default, which ComplyTrain uses unless someone chooses another layout when they export or publish a document. This topic covers the tasks; every block, setting and token is listed in the document layout reference.
Product location: /settings/document-layouts. Open Settings, then Document Layouts.
An organisation Admin can create, change, duplicate, delete and set the default layout, and can upload and delete fonts. You can give the same rights to other people with a role that includes the Manage Document Layouts permission (document-layouts:manage); see roles and permissions.
Anyone who can export or publish a document can choose which layout to use for that file. They do not need the permission to do so.
Product location: /settings/document-layouts. Open Settings, then Document Layouts.
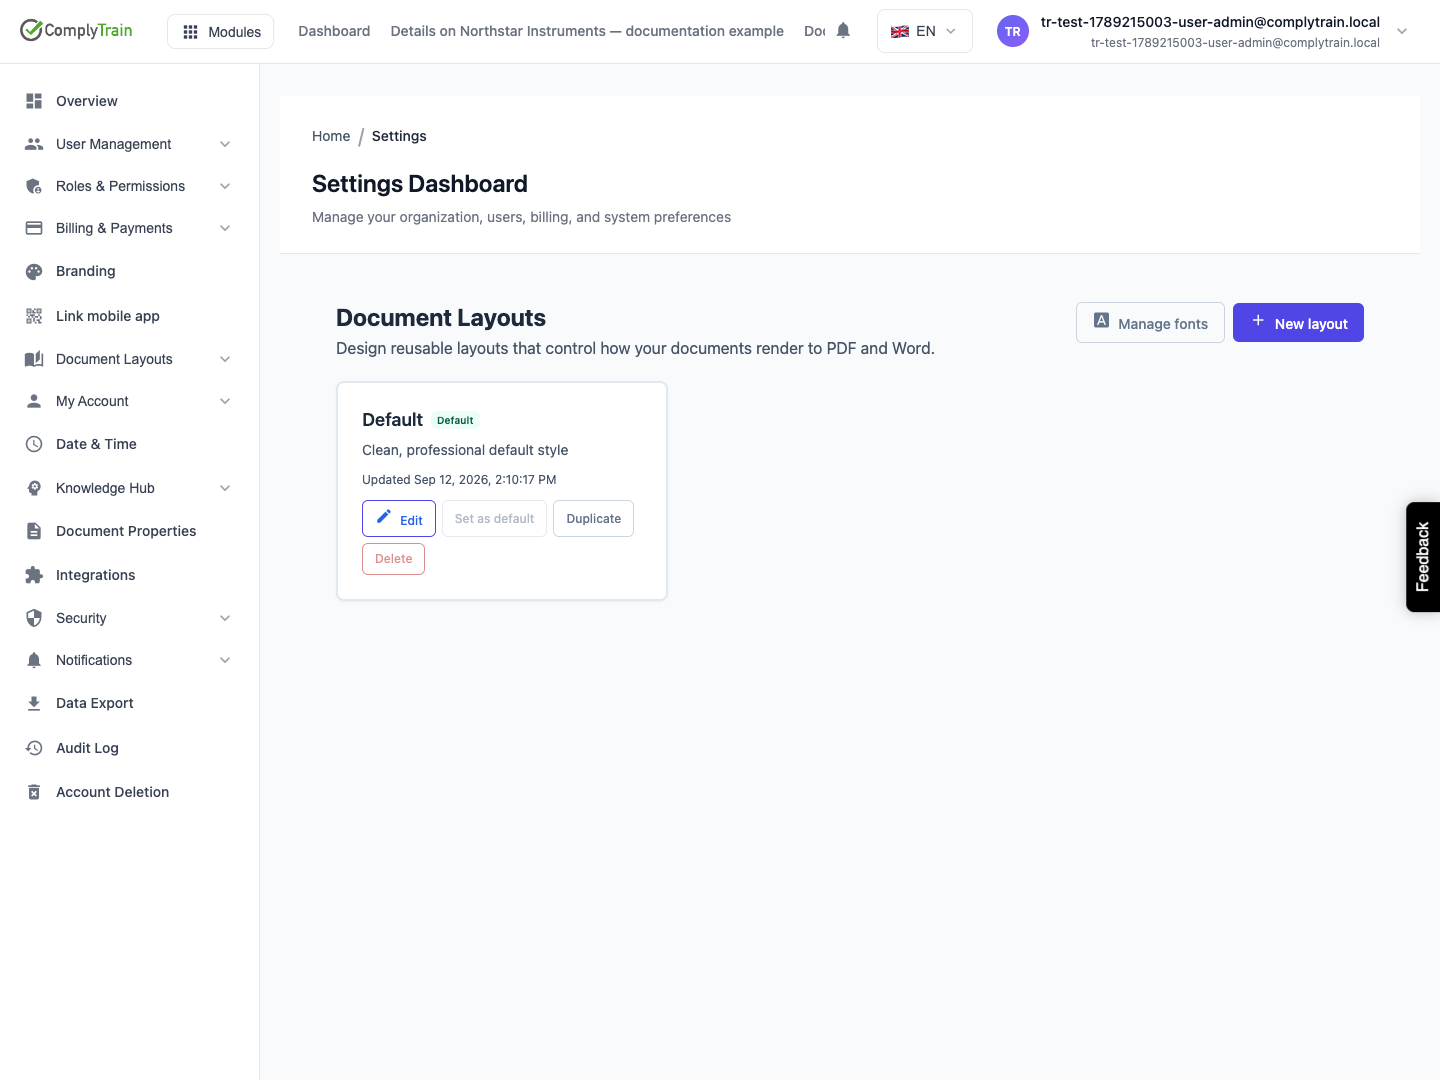
Open Settings, then Document Layouts. The page lists every layout as a card with its name, description (or No description) and when it was last updated. The default layout carries a Default badge.
Card action | What it does |
|---|---|
Edit | Opens the layout in the designer. |
Set as default | Makes this layout the organisation default. Not available on the layout that is already the default. |
Duplicate | Creates a copy and opens it in the designer. |
Delete | Deletes the layout after confirmation. Not available on the default layout. |
A new organisation starts with one layout, named Default, that has no blocks and no page overlays. Documents rendered with it contain the document body and the closing requirement traceability page only. Add a cover page, contents and page furniture to it, or build a new layout and make that the default.
Product location: /settings/document-layouts/new. Choose New layout on Document Layouts, or Duplicate on a layout card.
Choose New layout. The designer opens with an empty layout.
Enter a Name, for example Corporate — ISO 9001. The name is required, can be up to 100 characters and must differ from the names of your other layouts.
Optionally enter a Description of up to 500 characters, such as what the layout is for.
Compose the layout as described below, then choose Create layout.
ComplyTrain confirms Layout "…" was created. and reopens the saved layout, so you can continue working on it.
To start from an existing design, choose Duplicate on its card. The copy is named after the original with (Copy) added, or (Copy 2), (Copy 3) and so on when earlier copies keep that name. It is never the default and opens straight away in the designer.
Your organisation can have up to 50 layouts. When you reach the limit, the page shows You have reached the maximum of 50 layouts. and New layout and Duplicate are unavailable until you delete a layout.
Product location: /settings/document-layouts/{layoutId} (fallback: /settings/document-layouts). Choose Edit on the layout's card, then open Front matter, Content, Back matter or Page overlays.
The designer has four collapsible sections. Select a section heading to open or close it; the number beside Front matter and Back matter is the number of blocks in that section.
Section | What you put in it |
|---|---|
Front matter | Pages before the document body: Front page, Table of contents, Version history, Free-text page. |
Content | How the body renders: Section pagination, Cross-document references, Document colours and Typography. |
Back matter | Pages after the body: Signature page, References appendix, Version history, Free-text page. |
Page overlays | Page header, Page footer and Watermark on every page. |
To add a block, choose its button under Add block. The block opens so that you can fill in its settings; blocks that can appear only once disappear from Add block after you add them. Reorder blocks by dragging the handle, or with Move up and Move down, and delete one with Remove. A section can hold up to 25 blocks.
A Front page block is composed of elements. Choose element buttons under Add element, such as Logo, Document title or Metadata table, then order and configure them in the same way as blocks.
For a page overlay, choose Add beside Page header, Page footer or Watermark, and Remove to take it off again.
Some settings show an image: Logo with the source Uploaded image asset, the Image element, Header logo, and a Watermark in Image mode. Upload the image in the designer for each of them. The image appears in the preview and in every file produced with the layout.
Text fields that accept tokens have an insert panel beside them. Place the cursor where the value belongs and choose a token, such as Document code or Page number, to insert it; the reference lists what each token prints.
A block with a missing or invalid value shows Incomplete, and its section heading is marked. Open the block to read the message under the field.
Product location: /settings/document-layouts/{layoutId} (fallback: /settings/document-layouts). Choose Edit on the layout's card and use the Live preview panel beside the designer.
The Live preview panel sits beside the designer, or below it in a narrower window. It turns the layout you are editing into a PDF and shows it in the panel, including changes you have not saved yet. Previewing never saves the layout.
The preview renders as soon as the designer opens.
With Auto selected, which is the default, it renders again about a second after you stop changing the layout. Clear Auto if you prefer to render only when you choose Refresh.
Refresh renders the current state straight away. While a render runs, Rendering preview… appears over the previous preview.
If the layout contains a value that cannot be rendered, the panel shows the reason instead of the PDF. Correct the value and the next render replaces the message.
The preview uses a built-in sample, not one of your documents: Sample Document, code SAMPLE-001, for ISO 9001 — Quality management systems, with the status Approved and two sections, Purpose and Scope, that contain a list and a table. The sample has no approval record, version history or cross-document references, so those blocks show their empty lines and messages. Because the sample is Approved, a watermark limited to Draft documents only does not appear in the preview.
The preview is always a PDF. To check the Word result, or to see the layout with a real document, save the layout and export that document with it; see export document files.
Product location: /settings/document-layouts/{layoutId} (fallback: /settings/document-layouts). Choose Save changes, or Create layout for a new layout, in the designer's top bar.
Choose Create layout for a new layout or Save changes for an existing one. The button is available when the layout has a name, no block is Incomplete, and you have changed something since the last save. Otherwise the bar shows Resolve the highlighted issues to save. when there are problems to fix.
Each layout needs its own name. If another layout already uses the name you entered, saving is refused with a message that says so; choose a different name.
A text field can contain only the tokens offered in its insert panel. If you type a token by hand and it does not match one of them exactly, saving is refused and the message names the token.
After a successful save, ComplyTrain confirms Layout "…" was saved. The change applies to every file produced with this layout from then on. Files already downloaded and versions already published to the vault keep the appearance they had.
If you leave the designer with unsaved changes, Discard changes? asks you to confirm. Choose Discard to leave without saving, or Cancel to stay.
If someone else saved the same layout after you opened it, Save changes reports This layout was changed elsewhere. Reload and try again. Your edits stay on screen but are not saved. Note what you changed, go back to Document Layouts, open the layout again with Edit to load the other person's version, and make your changes again.
Product location: /settings/document-layouts. Open Settings, then Document Layouts.
Choose Set as default on the layout's card. ComplyTrain confirms "…" is now the default layout. and moves the Default badge. There is always exactly one default.
The default is the layout that:
is used for a QMS document whose document type has no layout of its own;
is used for documents that ComplyTrain renders without asking for a layout, such as Tender response documents.
Product location: /settings/document-layouts. Open Settings, then Document Layouts.
Give each kind of QMS document its own layout, for example one for procedures and work instructions and another for forms and records.
Open the layout and find the Document types panel. It lists your organisation's QMS document types.
Tick the types that should use this layout. A type has one layout at a time. If a type already belongs to another layout, ComplyTrain names that layout and asks you to confirm the move.
Choose Save changes.
The layout's card then shows Used for with the assigned types. Untick a type to return it to the default layout. Deleting a layout that has document types asks you to confirm, and those types then use the default layout. Manage the document types themselves in document type settings.
Product location: /qms/{standardCode}/documents/{documentId}/editor (fallback: /settings/document-layouts). In a QMS document, choose Export Document and open Rendering layout.
When someone exports or publishes a QMS document, Export Document includes a Rendering layout list. It starts on Automatic: the layout assigned to the document's type, or the default layout when the type has none. The list also names every layout, marking the default with · default, so a person can choose a different layout for that one file. Manage layouts below the list opens this page.
The layout is chosen for each file, not stored on the document. The same document can be downloaded with one layout and published with another. See export document files and publishing and approval.
Product location: /settings/document-layouts/fonts. Choose Manage fonts on Document Layouts, or Layout Fonts in the Settings navigation.
Choose Manage fonts on Document Layouts, or Layout Fonts under Document Layouts in the Settings navigation, to open Document Fonts.
Drop a font file on Drop a font file here or click to browse, or select it and browse to the file. The file must be TTF or OTF and no larger than 5 MB.
Wait for Font "…" was uploaded. ComplyTrain reads the family name, weight and style from the file itself.
Each file is one variant of a family, such as Regular 400 or Bold 700. Upload a separate file for each weight and style you need. The same file cannot be uploaded twice, and a family can hold only one file for each weight and style; delete the existing variant before you upload a replacement. Your organisation can upload up to 24 font files.
The list shows each file with Preview, Family, Weight, Style (Regular or Italic), Format and Size.
Every uploaded family is added to the Font lists in the designer, next to the built-in families such as Arial, Calibri and Georgia. Choose it by its family name for any typography role; see the typography reference. ComplyTrain embeds the family in the PDF and Word files it produces, in every weight and style you uploaded, so readers see your corporate font without installing it.
To delete a font, choose Delete and confirm Delete font. If any layout still uses the family, deletion is refused with a message naming the family. Change those typography roles to another font or Inherit, save the layouts, and delete the font again.
Product location: /settings/document-layouts. Open Settings, then Document Layouts.
If the layout is the default, set another layout as the default first.
Choose Delete on the layout's card.
Read Delete "…"? This cannot be undone. and choose Delete.
ComplyTrain confirms "…" was deleted. Files produced with the layout earlier are not affected. The layout disappears from Rendering layout, so later exports use another layout.
Product location: /settings/document-layouts/new. Choose New layout on Document Layouts.
Your quality team wants every controlled procedure to have a cover page, a revision table, an approval page and a clear DRAFT mark until the procedure is approved.
Choose New layout and name it Controlled procedure, with the description ISO 9001 procedures and work instructions.
In Front matter, add Front page. Add the elements Logo (Source: Tenant branding logo, Max width (pt) 160), Spacer (48), Document title, Subtitle, Spacer (24) and Metadata table with Document Code, Version, Status and Approved At. Finish with Free text: Uncontrolled when printed. Check ComplyTrain for the current version.
Still in Front matter, add Table of contents with Depth 2, then Version history with the Title Revision history.
In Content, keep Start each top-level section on a new page selected and keep Appendix under Cross-document references.
In Back matter, add References appendix, then Signature page with Include approver and Include approval date selected.
In Page overlays, add Page header with Left text {{document_code}} and Right text Version {{version}}. Add Page footer with Show page numbers selected and Classification banner Internal.
Add Watermark, set Mode to Text, keep the Text DRAFT and set Scope to Draft documents only.
Check the cover, contents and footer in Live preview. To judge the watermark, set Scope to All documents for a moment, look at the preview, then set it back to Draft documents only.
Under Document types, tick the types for procedures and work instructions, and choose Create layout. Every procedure and work instruction now exports with this layout when Rendering layout is left on Automatic.
Export a procedure whose status is Draft with this layout, and check that the watermark, revision table and approval page appear as intended. Once the procedure is approved, its next export shows the approver's name and the approval date on the signature page, and no watermark.
