Attach and inspect evidence, review freshness and preserve the link from observation to finding.
Product location: /qms/audits. Select Audits, open the engagement and choose Observations or Evidence. The tab and selected record are not encoded in this URL.
Use QMS / Audit & Inspection to open the engagement, then choose Observations or Evidence. These functions require the QMS audit-management permission, including reading or downloading the evidence. Being named on an audit team does not itself grant that permission.
Evidence uploads need an audited standard and that standard's Collected Evidence vault. Complete the standard's setup before fieldwork. An enabled standard or a documentation vault alone does not establish that its evidence vault is ready.
For a new single-standard audit, create the engagement from the standard's Audits workspace. This path saves the standard association. Creating through the general audit workspace does not add a standard by itself. Check the engagement's actual standard scope before uploading; do not change the audit's intended scope merely to make a file upload succeed.
The upload service can use a linked finding's standard, an explicitly supplied standard, or the engagement's single audited standard. The released upload form has no standard selector. A general engagement with no standard, or an ambiguous multi-standard upload, can therefore require a product or setup correction. A missing Collected Evidence vault needs setup repair by the administrator responsible for the quality system.
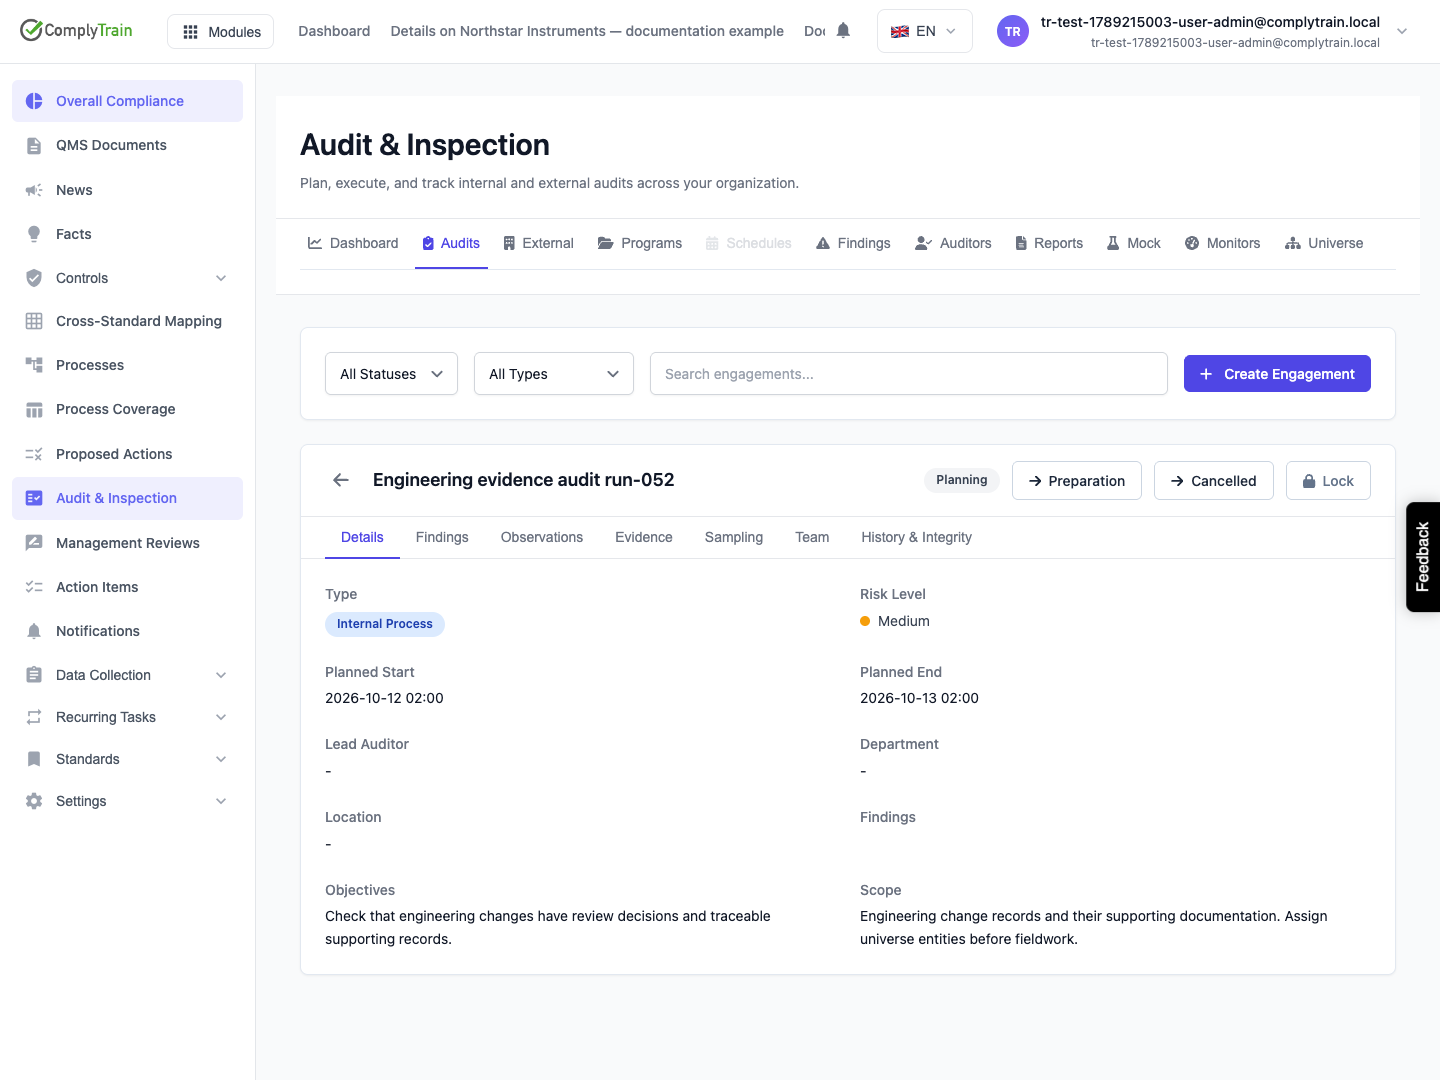
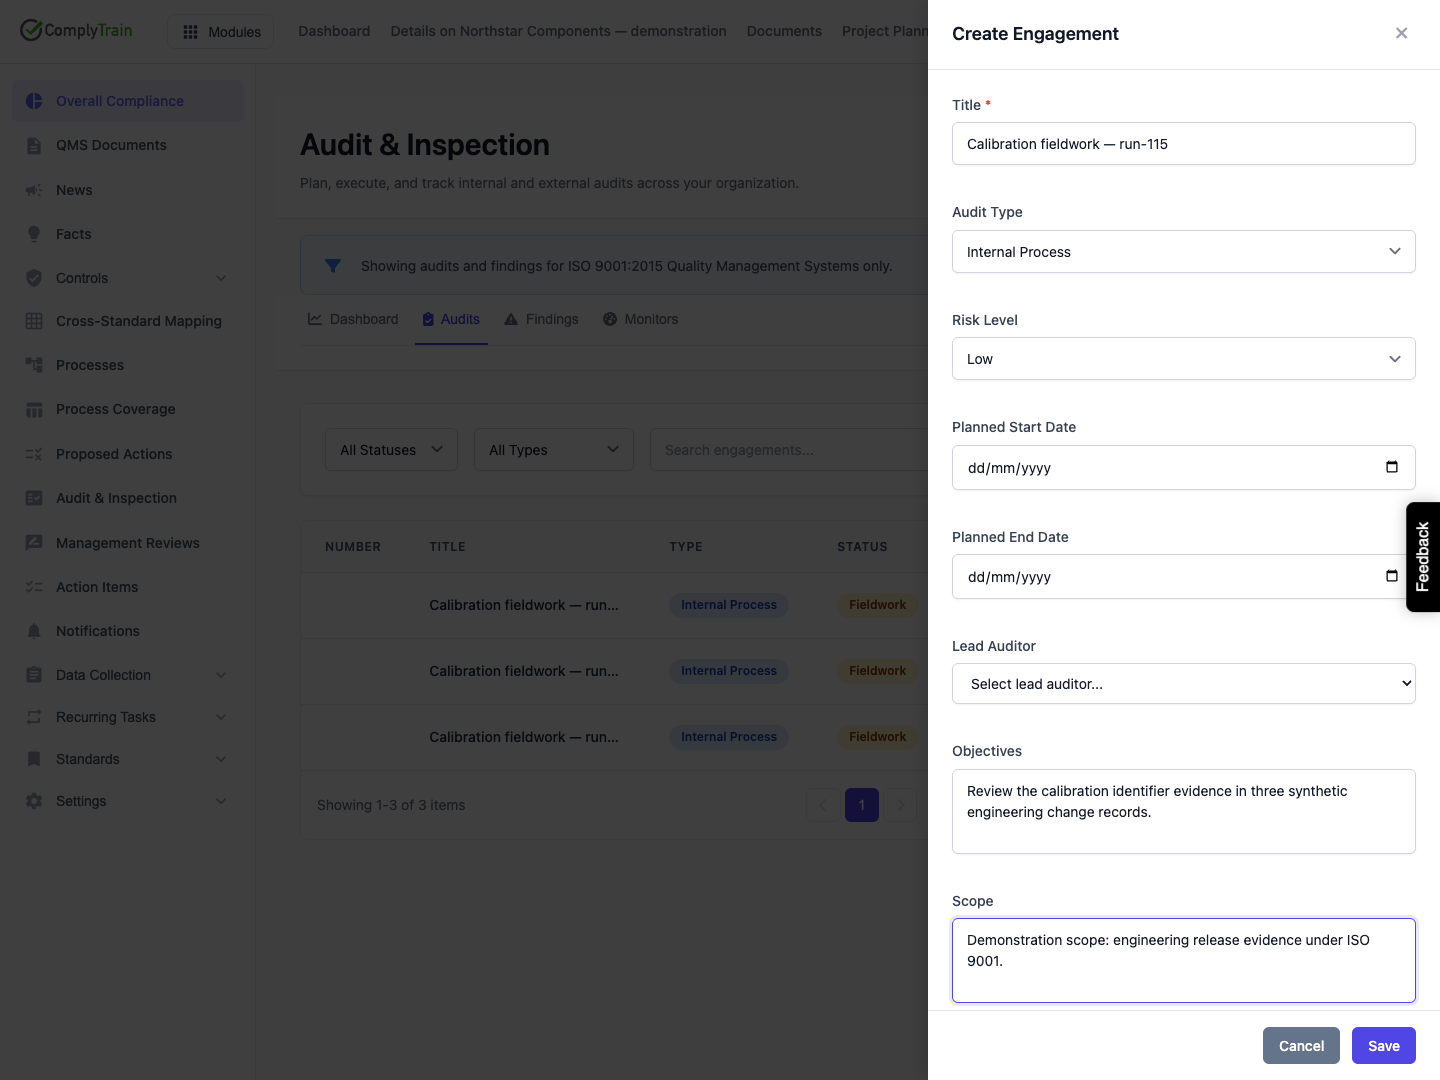
Product location: /qms/audits. Select Audits, open the engagement and choose Observations or Evidence. The tab and selected record are not encoded in this URL.
An observation records what the auditor saw or heard. A finding is a separately classified and reviewed conclusion. Keep the factual record useful even when it does not become a finding.
Open Observations, then Add observation.
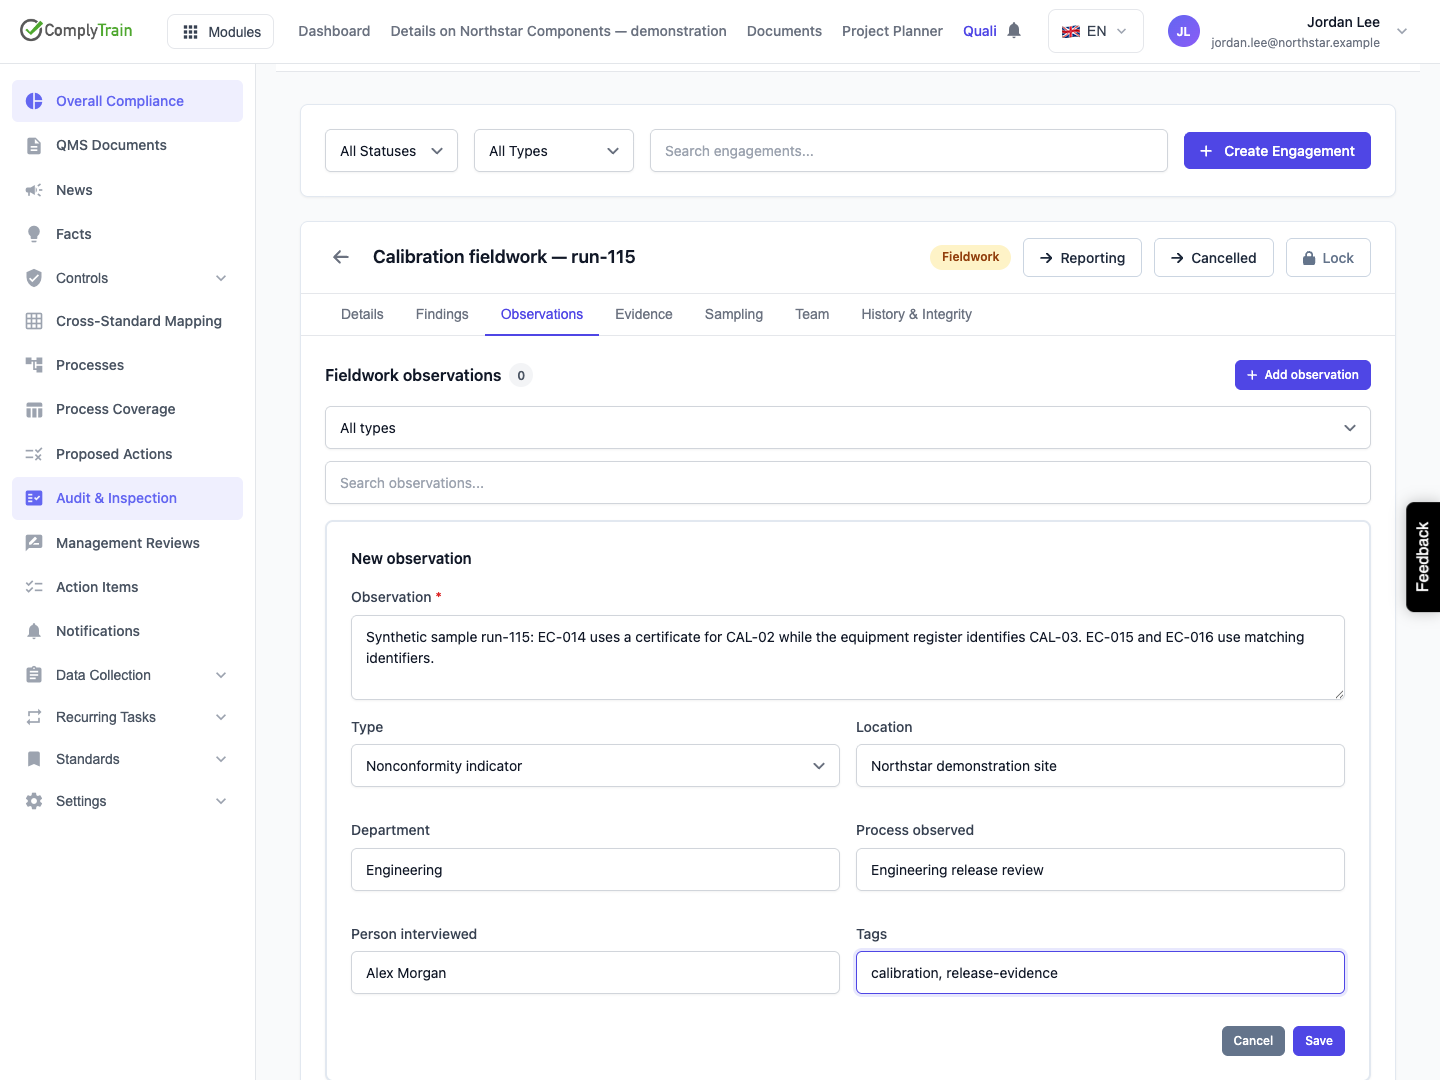
Describe the observed condition and the identifiable record, activity or interview supporting it.
Complete the context fields and select Save.
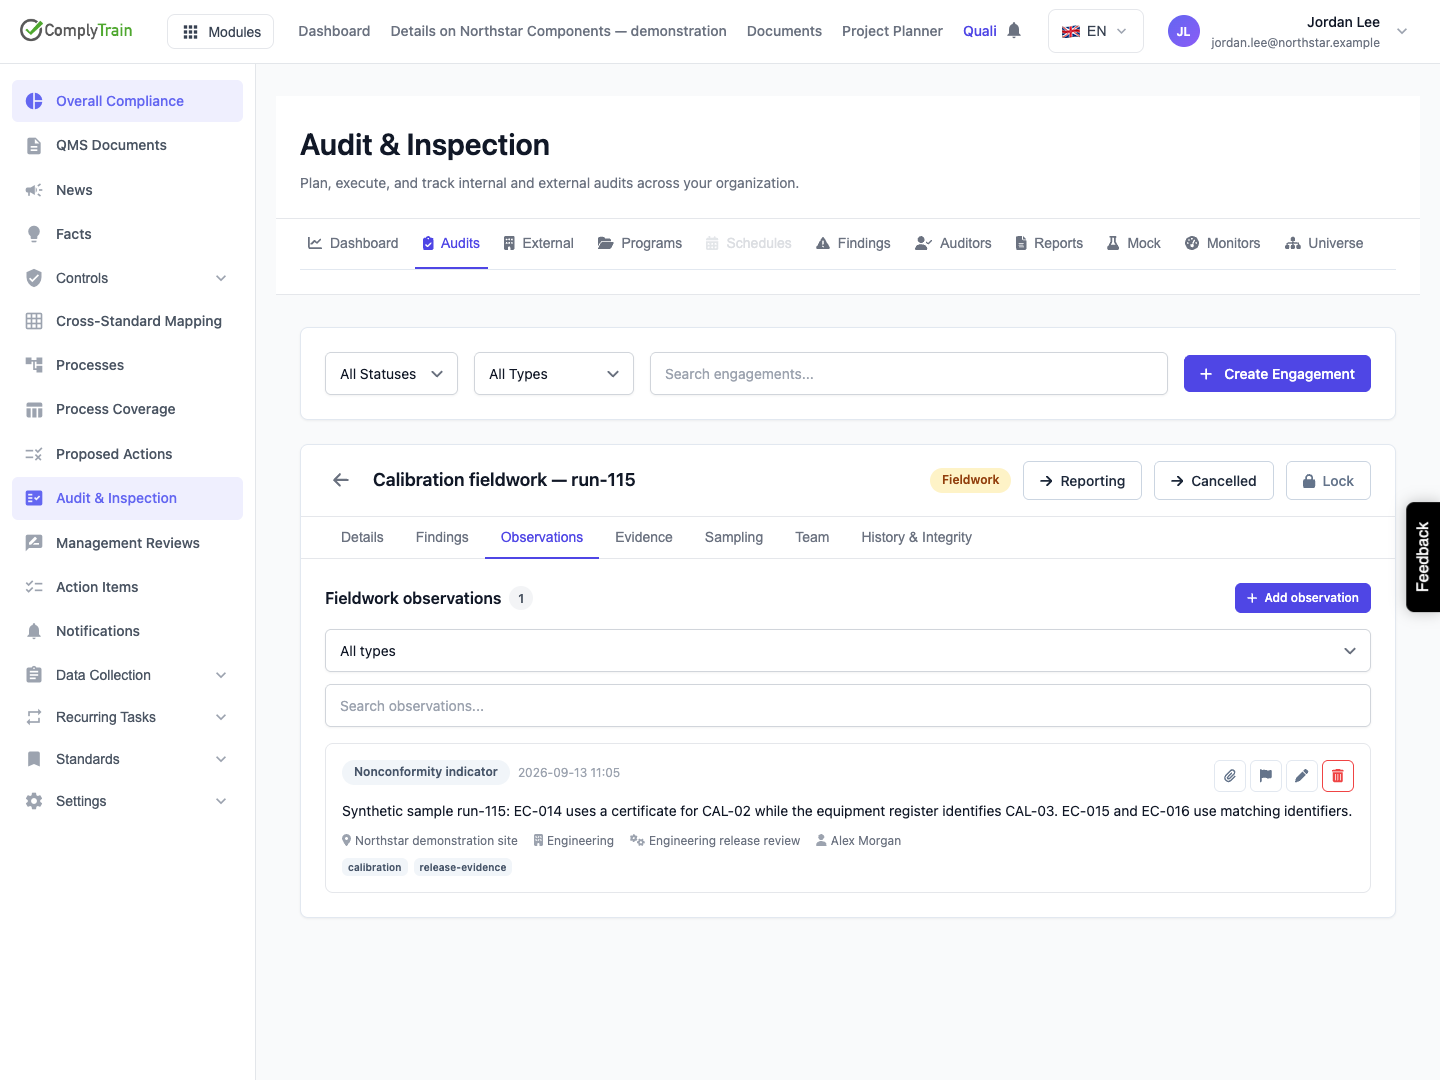
Reopen the engagement and confirm the observation, context and tags are retained.
Field | Meaning and choices |
|---|---|
Observation text | Required nonblank factual description. Distinguish direct inspection from an interview statement. |
Type | General, Positive, Concern, Nonconformity indicator or Process observation. General is the initial choice. |
Location | Optional location, up to 300 characters. |
Department | Optional department, up to 200 characters. |
Process observed | Optional process name, up to 200 characters. |
Person interviewed | Optional name, up to 200 characters. This is interview context rather than an assigned user account. |
Tags | Optional comma-separated terms for identifying the subject. |
Use the type filter and search to locate observations. Clear the filters before concluding that a record is missing. An unconverted observation offers Edit, Delete, Convert to finding and the paperclip Show attached evidence action. Review the consequence in a deletion confirmation before removing a factual record.
Product location: /qms/audits. Select Audits, open the engagement and choose Observations or Evidence. The tab and selected record are not encoded in this URL.
Choose the panel according to where the evidence belongs:
Where you upload | Resulting association |
|---|---|
Engagement's Evidence tab | Evidence belongs to the engagement. |
Observation's Show attached evidence panel | Evidence belongs to that observation and the engagement. |
Finding's evidence panel | Evidence belongs to that finding and the engagement. |
Opening a panel does not move evidence that was uploaded elsewhere. The finding's Objective Evidence text field also does not attach a file. Use the actual evidence panel and inspect the saved association.
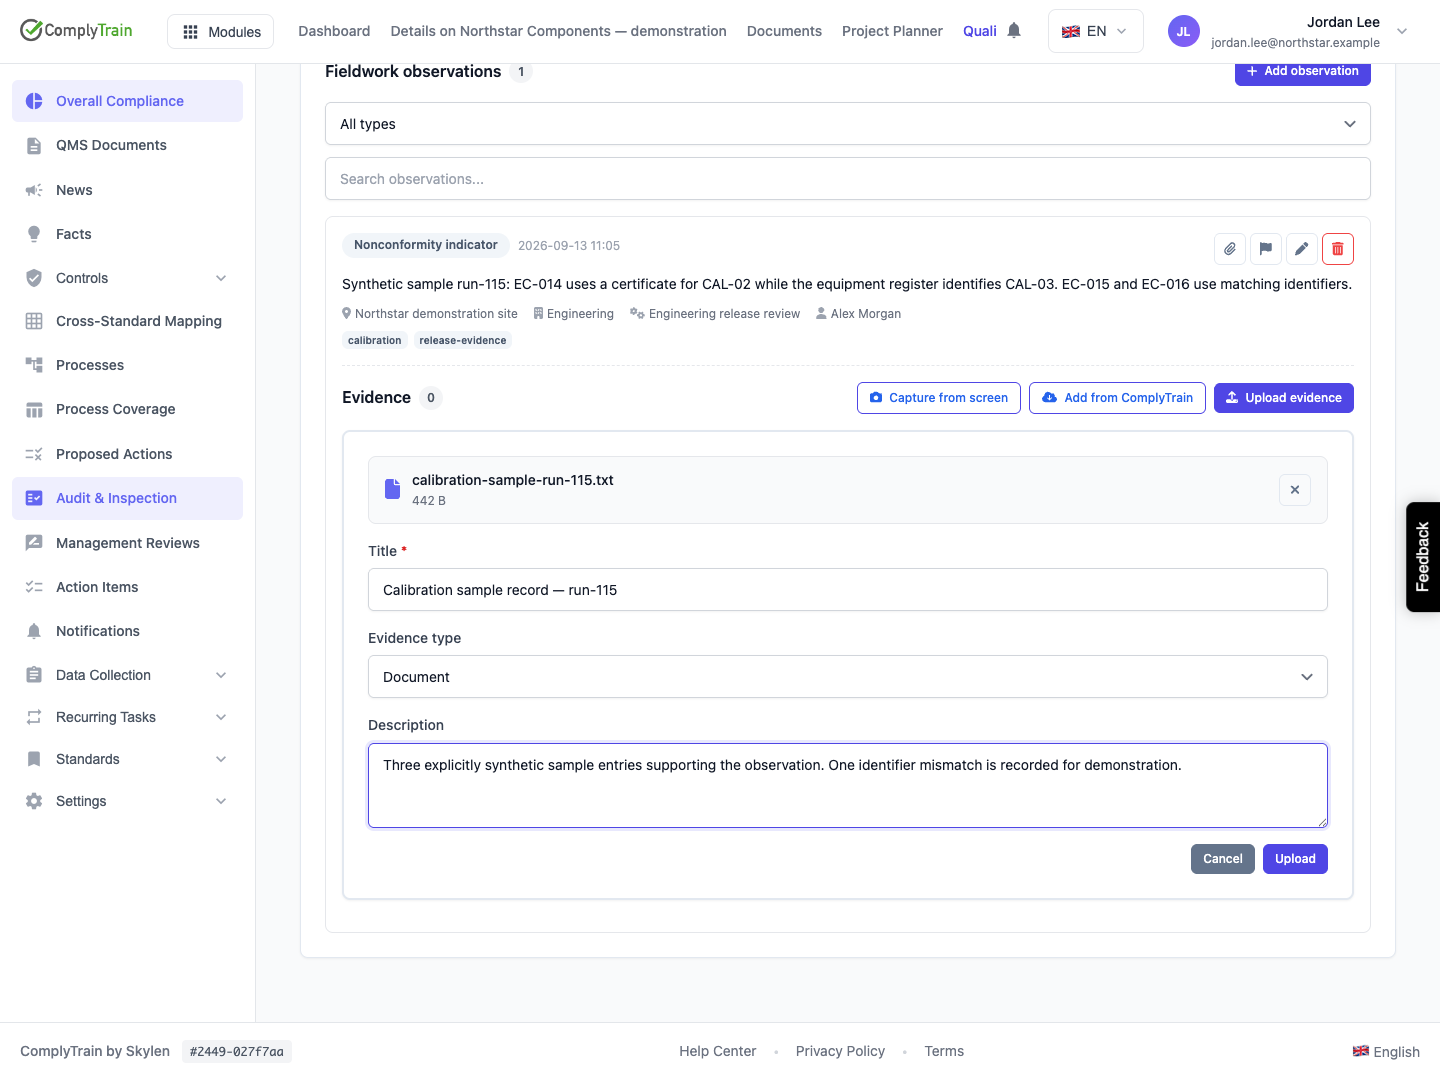
Select Upload evidence, pick or drop a file, then review the fields before Upload:
Field | What to check |
|---|---|
File | The actual supporting file, no larger than 100 MB. Selecting a file prepares the upload; it does not save it. |
Title | Required, up to 300 characters. Use a title that distinguishes the record and period. |
Evidence type | Photo, Document, Audio or Video. The initial choice is Detect from file; select an explicit type when needed. |
Description | Explain what the file supports, its context and any relevant limits. |
The picker accepts PDF; Word, Excel and PowerPoint files; TXT, Markdown, CSV and HTML; PNG, JPEG, GIF, WebP and HEIC; MP3, M4A, WAV, OGG and AAC; and MP4, WebM and MOV. Acceptance for storage does not mean every format has an inline preview or supports AI verification.
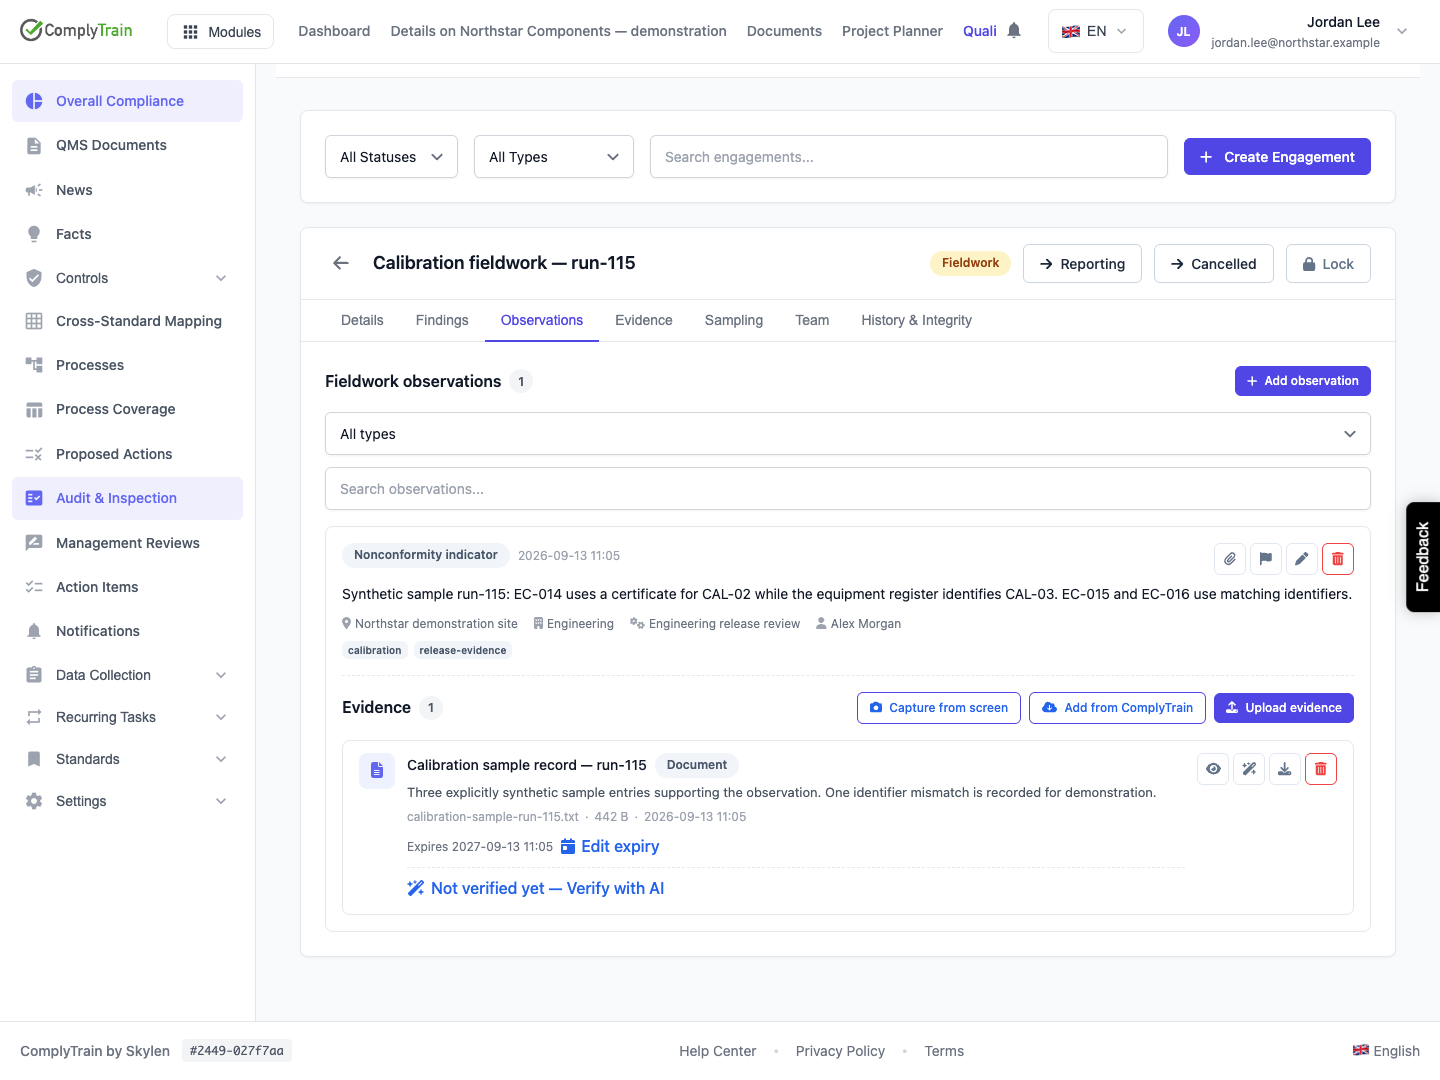
Wait for the upload to finish. Confirm the saved title, type, filename and context. The file is stored as a controlled document in the standard's evidence vault; the audit evidence entry supplies its audit association. The examples use an explicitly labelled synthetic three-record sample.
Product location: /qms/audits. Select Audits, open the engagement and choose Observations or Evidence. The tab and selected record are not encoded in this URL.
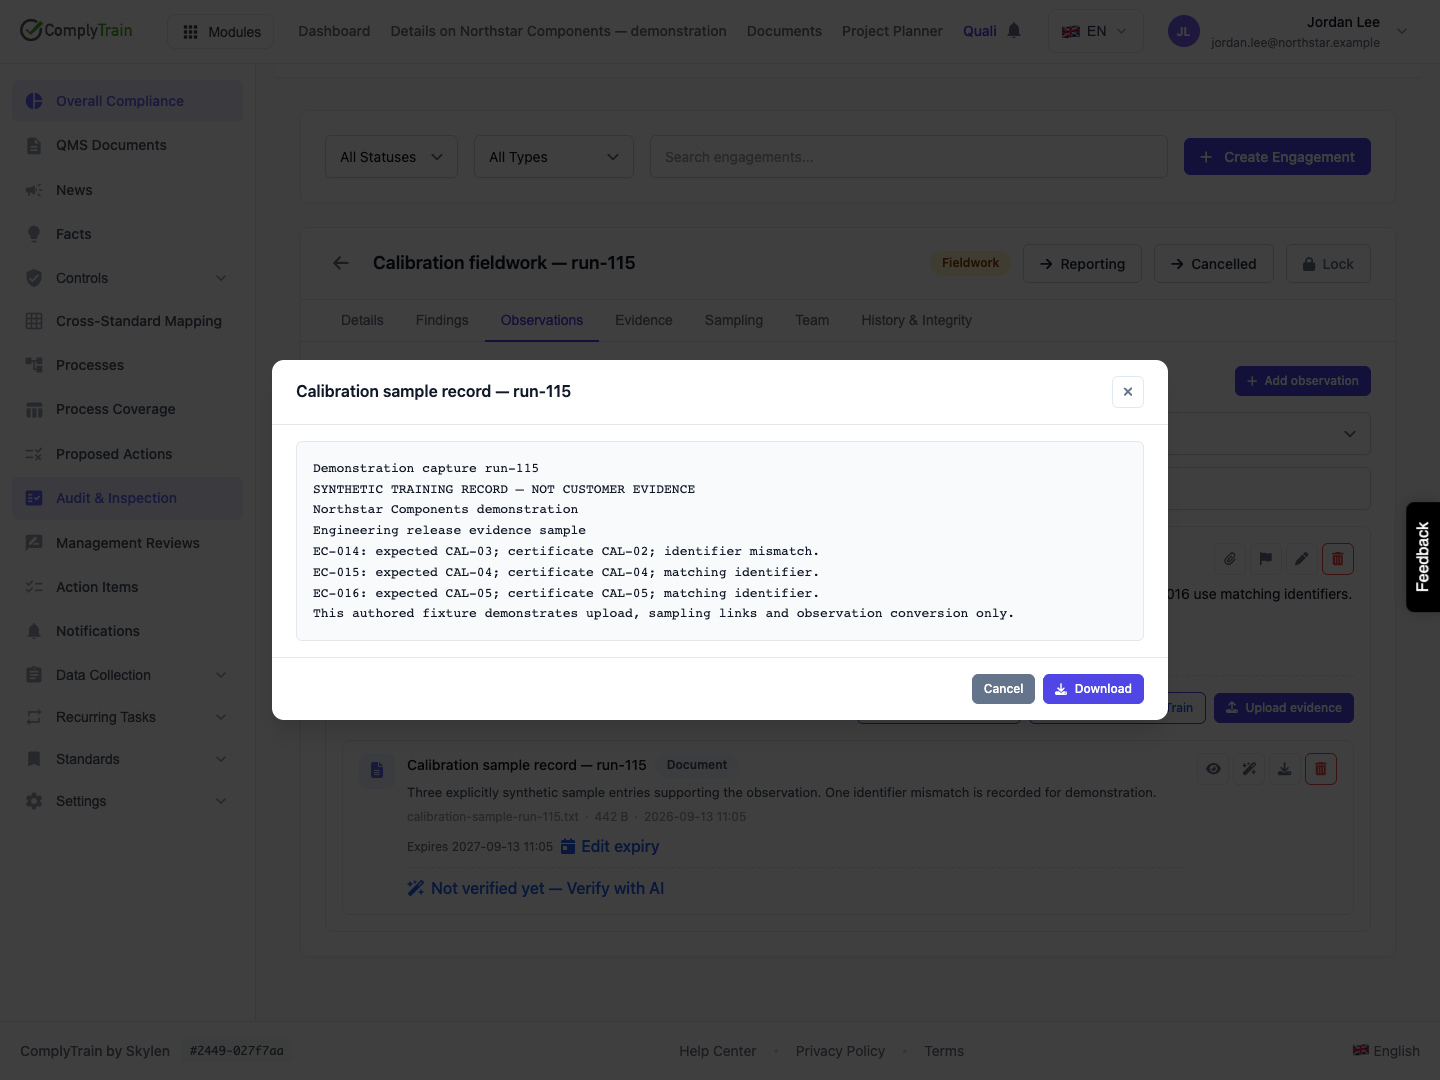
Use Preview to inspect supported image, PDF or text content. Check the actual contents against the record described in the observation. A title or successful upload message alone does not establish that the correct file was supplied.
Use Download when a file cannot be previewed or when you need its original contents for review. A failed or blank preview does not prove that the stored file is empty; inspect the download and report the specific preview problem. Text preview is demonstrated in this guide. Other format-specific preview behaviour requires its own check.
Product location: /qms/audits. Select Audits, open the engagement and choose Observations or Evidence. The tab and selected record are not encoded in this URL.
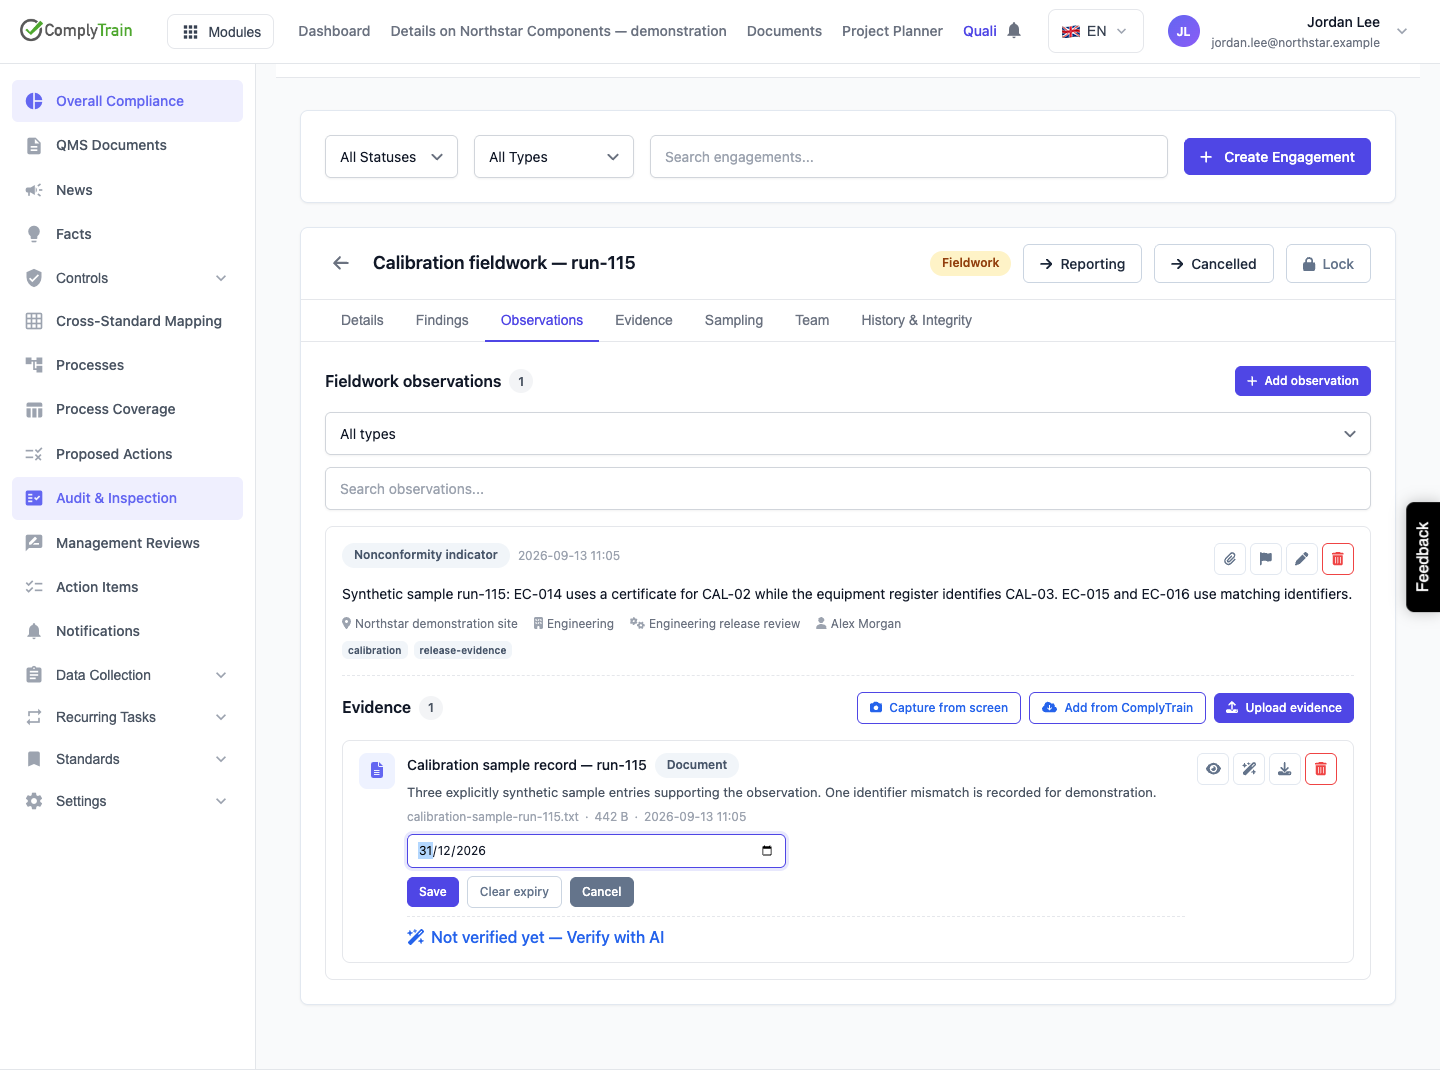
Evidence can carry an expiry date that identifies when its freshness needs review. This is separate from a finding's response or closure due date.
The released default is a 365-day freshness period for documents, document snapshots, photos and form submissions. Audio, video, observation notes and interview records have no default expiry. Deployment configuration can change these defaults, so use the date on the saved item as the operative value.
Use Edit expiry when a date exists, or Set expiry when it does not. Choose the Evidence expiry date, then Save. Reopen the record and check the retained date. Clear expiry removes the date; it does not establish that the evidence remains valid indefinitely in the real world.
An expired item is marked Stale. Re-collect or review the evidence before relying on it. Do not extend its date merely to remove that indicator. Freshness, file availability, AI assessment and the auditor's conclusion are separate checks.
Product location: /qms/audits. Select Audits, open the engagement and choose Observations or Evidence. The tab and selected record are not encoded in this URL.
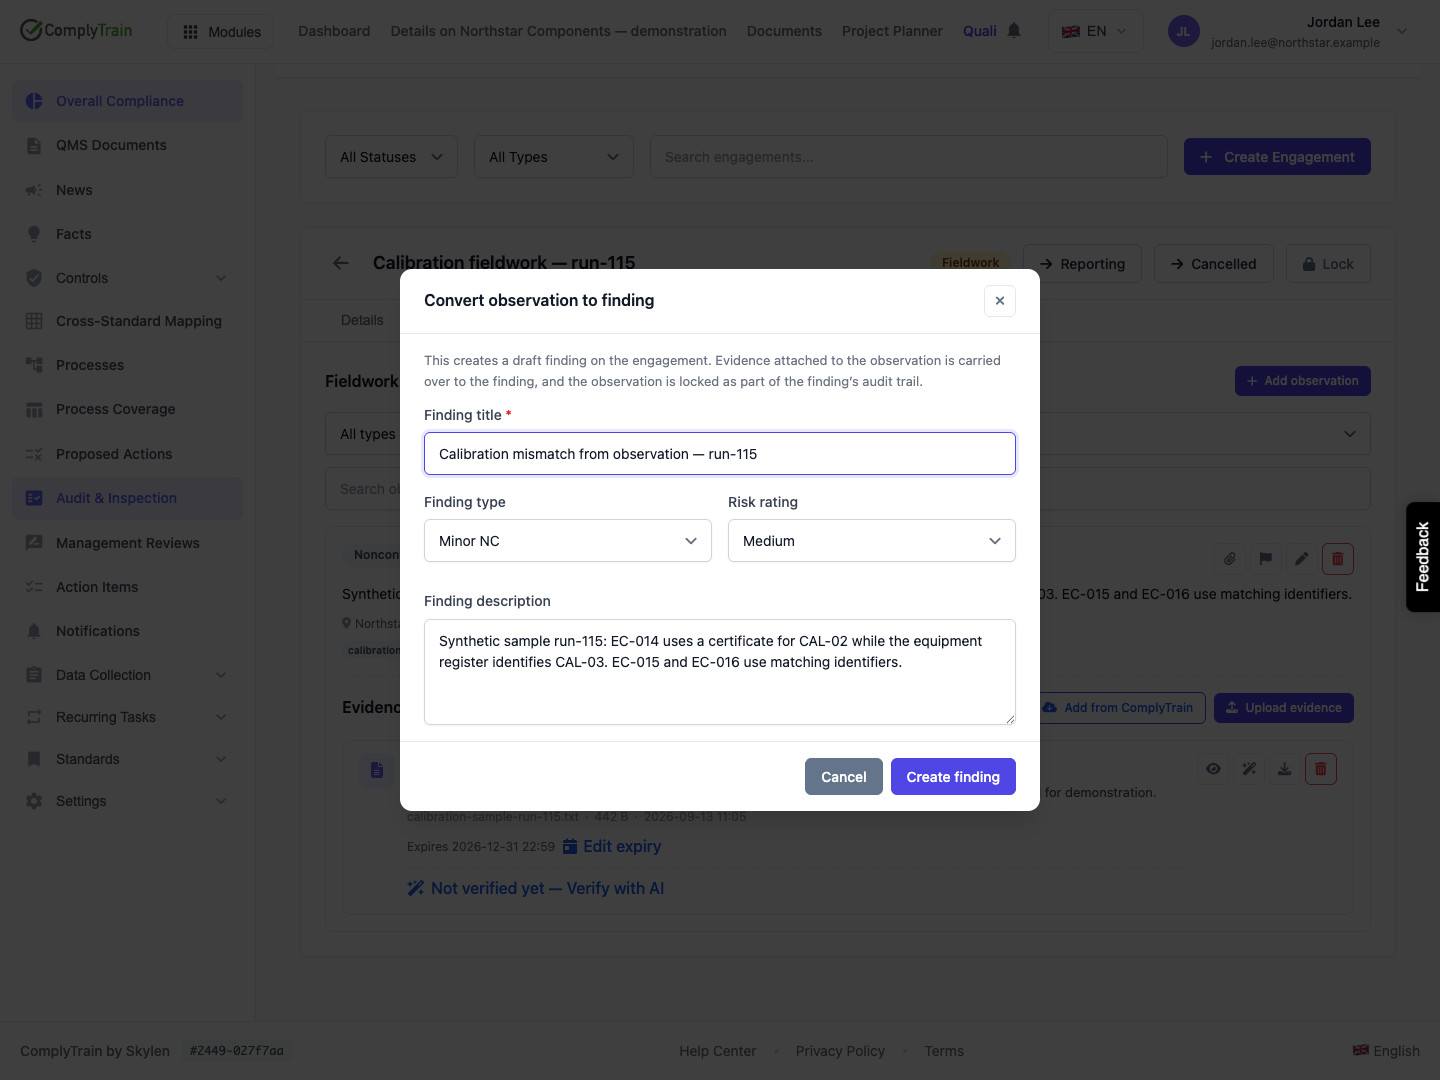
Select Convert to finding on the observation when the evidence warrants a formal finding. Review the proposed title, description, classification and optional risk rating. A Nonconformity indicator initially proposes a Minor NC; other observation types initially propose an Observation. The auditor must decide the appropriate classification.
Select Create finding, then inspect the outcome:
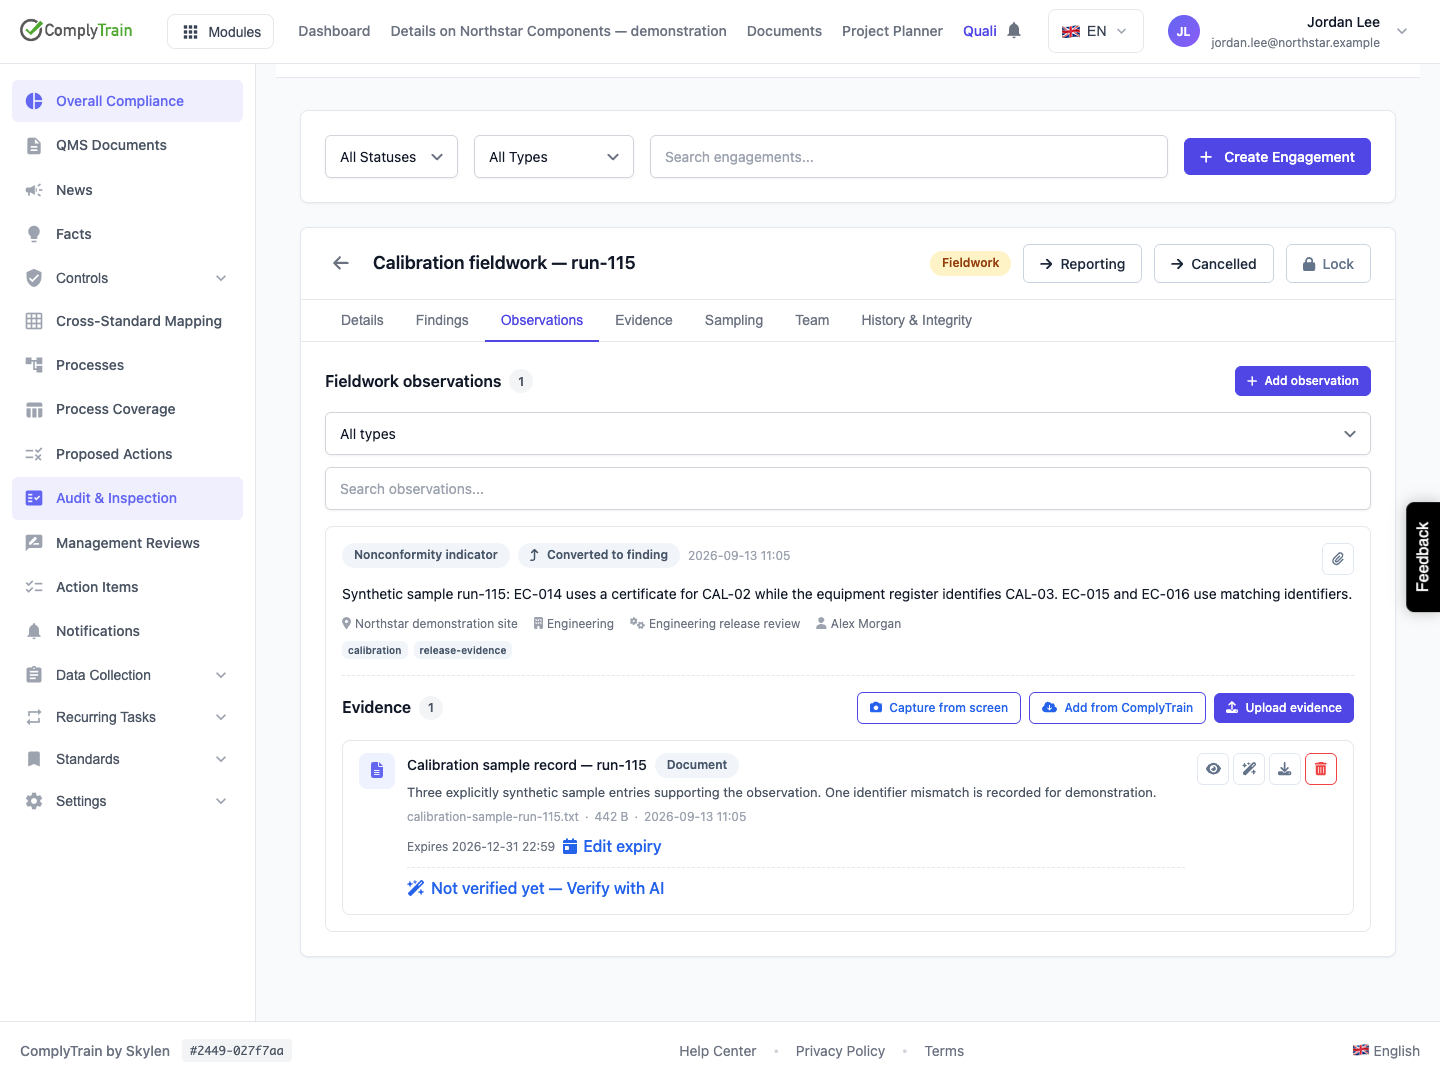
The original observation is marked Converted to finding.
Its ordinary edit and delete controls are removed.
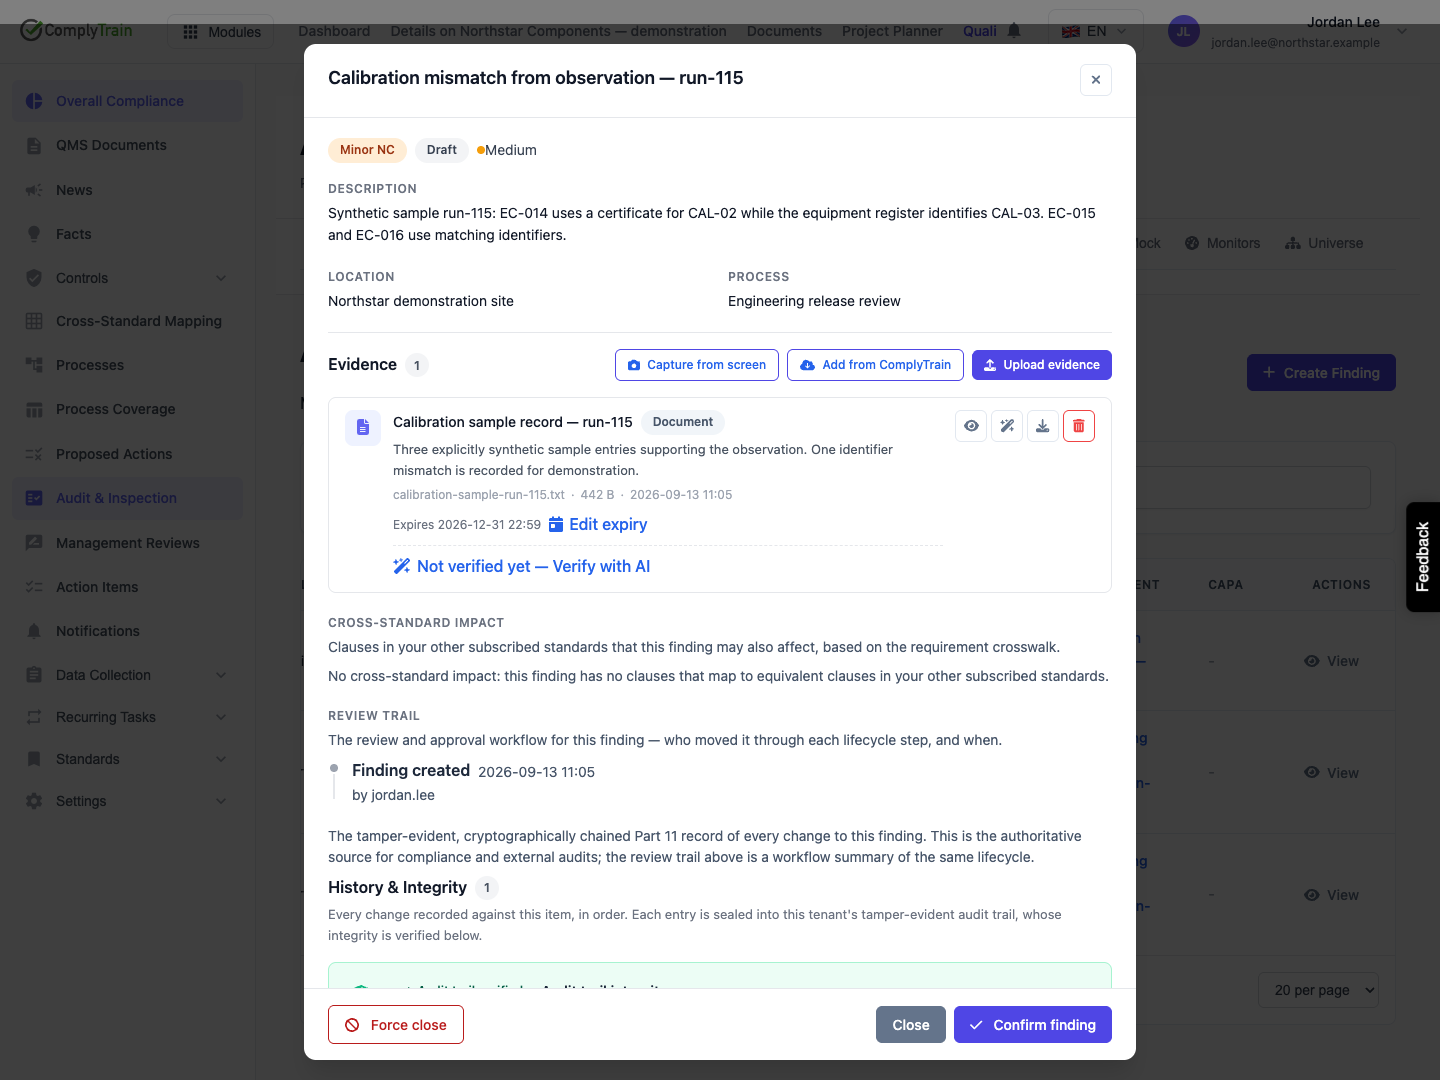
A new finding starts in Draft.
Evidence already attached to the observation is also linked to the finding, retaining the evidence record's identity.
Open the finding through Findings / View and confirm the description and attachments. Conversion is not confirmation, auditee response, verification or closure. Continue with the finding lifecycle guide for those decisions.
Product location: /qms/audits. Select Audits, open the engagement and choose Observations or Evidence. The tab and selected record are not encoded in this URL.
Add from ComplyTrain offers sources enabled for the workspace, such as CAPAs, QMS documents, records and training. Choose a source, search for the intended artifact, inspect its identity and select Import. An Already imported indicator prevents repeating the same import.
In this release, the import form sends the engagement association only, even when opened inside an observation or finding panel. Do not assume an imported item is automatically attached to that observation or finding. Check the engagement's Evidence tab and the required context before relying on the association.
An imported entry records its provenance. Supported source badges can open the original CAPA, document or record; training does not have the same per-entity deep link. If the source has gone away, the badge indicates that condition. Check the retained evidence and the original source separately; one is not proof that the other is still available or current.
Product location: /qms/audits. Select Audits, open the engagement and choose Observations or Evidence. The tab and selected record are not encoded in this URL.
When the browser supports it, Capture from screen opens the browser's screen-sharing choice. Select the intended tab, window or screen and review the resulting capture before uploading it. The capture analysis can suggest a title, summary and key facts; review those suggestions as well as the image. Cancelling or denying browser sharing leaves no completed capture.
Record the source, context and date in the evidence description. A screenshot shows the visible state at capture time; it does not replace a complete underlying record or prove that a background operation completed. This guide's accepted upload example uses a file, so browser screen-sharing success is a separate execution check.
Product location: /qms/audits. Select Audits, open the engagement and choose Observations or Evidence. The tab and selected record are not encoded in this URL.
Verify with AI assesses readable evidence against its available requirement context. It supports Photo and Document evidence with an associated file. Audio, video and document-snapshot evidence do not use the same verification path. The verifier has a separate file-size ceiling, 25 MB by default, which can be lower than the upload limit.
Review the result, rationale, confidence and requirement references together. The outcomes distinguish supporting evidence, partial support, lack of support and an indeterminate result. They do not confirm or close the finding and do not establish conformity for the whole audit or standard.
If no readable text can be extracted, the result can be Indeterminate without a model assessment. If no requirement is grounded, do not describe the result as verification against a specific clause. A model or extraction failure is an error, not a favourable verdict.
Open the verification history to inspect earlier runs, their request time, acting user and outcome. Re-verify starts a further assessment while preserving prior history. Compare the evidence and requirement context when interpreting different results. AI result success is not asserted by the upload screenshots in this guide.
Product location: /qms/audits. Select Audits, open the engagement and choose Observations or Evidence. The tab and selected record are not encoded in this URL.
Check whether the problem concerns the observation text, the file, its context, expiry or assessment before changing anything. Preserve sufficient explanation for another reviewer to understand the correction.
Deleting an audit evidence entry removes its audit evidence link and records a removal event. In the released implementation, the underlying controlled document remains in the standard's vault and follows that document's own lifecycle. Do not treat an evidence deletion as deletion of all copies or of the controlled source document.
Product location: /qms/audits. Select Audits, open the engagement and choose Observations or Evidence. The tab and selected record are not encoded in this URL.
Symptom | What to check |
|---|---|
Upload reports no audited standards | Check the engagement's saved standard association. New single-standard engagements can be created from the standard's Audits workspace. |
Upload reports no Collected Evidence vault | Have the administrator repair the standard's evidence-vault setup. Its documentation vault is a different vault. |
Upload cannot choose between standards | The released form has no explicit standard selector. Preserve the intended scope and request correction of the unsupported upload path. |
Upload reports identical content already exists | Find and inspect the existing controlled document. A renamed copy still has identical content; do not alter evidence merely to bypass the duplicate check. |
A file appears at engagement level only | Check where it was uploaded or imported; import does not automatically inherit the observation/finding context. |
An observation cannot be edited or deleted | Check whether it was converted to a finding and is now retained as part of that finding's history. |
Expected evidence is absent | Check the engagement, observation or finding scope, then any loading or permission error. |
AI verification is unavailable or fails | Check supported type, associated file, verifier size limit, readable content and the actual error. |
The record is stale | Review or re-collect the evidence; changing its date is not a substitute for review. |
For population definitions, sampled items and separate collection/conclusion indicators, see audit sampling.
